|
The Compost Toilet And The Compooposter:
In 2009 we
added a compost toilet with a fan and a vent stack. It is said that you can do without the fan if you have good ventilation. If you live with the thing, then that is dead wrong. When the air is still, you have no ventilation. Admittedly, the smell is not bad if you consistently dump a scoop of compost mix on top of every pile, but the smell of compost can get kind of rich too; it can get a little tiring. We do not run it all the time because at night it would drain the solar batteries - and I don't want to hear a fan all the time anyhow; I like the near absolute silence of the high desert. The occasional light whir of the fridge is noisy enough.
We have learned to get the fan going before lifting the lid at night to get rid of any tiny flies that may have found their way into the compost.
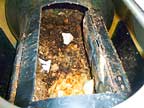
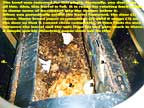
When I installed the toilet, I did not install the recommended overflow drain. The directions indicated that this might be needed during a party or when family come to visit, but we are not really equipped for either, so I skipped that. That was a mistake. Between the two of us, a frightening amount of urine was passing through the compost and dripping into the bottom pan of the toilet. It was getting close enough to the rim of the drawer opening that I had to siphon it out with a plastic tube into a shallow tray and take it away. (I then threw the tube out.)
When the fan is going, there is also a low energy heater evaporating the moisture in the pan. I suppose if they were running all night, there would be no accumulation, but I have the toilet plugged into a timer that cuts it off at dusk and back on in the morning after the sun hits the solar panels. Consequently, there were times at night when we could smell the urine, especially if the drawer was not completely tight, and we would have to turn it back on for a while. Normally the moisture and the smell are going to go up the stack anyhow, especially if there is a breeze creating suction at the top of the stack. If the flow stops and you begin to smell it, then the fan will get it going in the right direction again, and after a few minutes you can shut it off.
Keep in mind that when I speak of the smell, it has never been unbearable. By comparison, the smell at our standard variety toilet back east can be occasionally unbearable, especially my first of the day. That will always be the worst because it is concentrated. While we sleep, the body reclaims some of the moisture even as it adds to the content, so the first can be pretty powerful with a strong smell of ammonia. That one gets flushed fast. Through the day, to conserve water, I intentionally do not flush every time. When using the compost toilet first thing in the morning, the smell is not noticeable, and this is near dawn so the fan has not kicked on yet.
|
|
I drilled a large hole in the floor at an angle and inserted a grey 45 degree 1" PVC elbow into that hole which I then clamped and sealed in place. I then ran a hose up from below through the elbow, clamping it to one of the two drain outlets with a hose clamp, after removing the outlet's plastic plug. That solved the problem right away. The curved elbow, slightly larger than the hose, keeps it from crimping.
Outside, I dug an eight foot sloping trench 18" deep, beginning where the hose hangs, and laid a capped perforated septic drainfield pipe down the middle with 2x4's on each side to hold back the dirt. I then fed the hose through a hole in the cap on the near end and put a screw through them to lock the hose in place. After covering the whole thing with folded roofing paper and stone, I filled the trench. I probably should have laid in a bed of septic stone above and below, but I didn't have any. I do think this will do the job pretty much forever.
The other problem is that the composting just is not happening fast enough. I use the requisite compost and bacteria mixes. Perhaps it is the lack of humidity in the air. The dog poops that Molly drops out in her private spot dry quickly, harden and stay that way. They can take years to disintegrate, which means they just kind of slowly turn to a powder on the inside and crumble. The ones that she drops back east out in the woods stay moist and begin to decompose almost right away. They are completely gone within a month or so.
These same factors must affect the composting process, though inside the closed barrel I think the urine is supposed to provide enough humidity. So I am not sure what is going on here, or not.

 Let's talk about paper. Where composting is concerned, the name brand Charmin, Scott and other papers are terrible. They accumulate in growing masses and don't go away. When you rotate the barrel 180 degrees where the hinged top door is supposed to close, the growing globs of paper snag on the door and find their way into the works between the barrel, side flaps and the door. Believe it or not, the "recycled" papers are just as bad; they do not decompose either. Eventually it got to my having to pull the large clumps of Charmin out after they had dried and throwing them in the trash. Long ice cube tongs work well for this. However, that came to an end.
I found a paper that really does what I need it to do, thanks to a tip I came across at
InspectApedia.com -
Rite Aid toilet paper. Really! It works very well as a toilet paper, and yet it dissolves and goes away after it gets wet. I now periodically drop by one of their stores and stock up on a few dozen rolls of paper (and a few bags of their House Blend coffee which is excellent). BTW, be sure to get one of their free 'Wellness Cards' first, because you can rack up a big savings at the register with that card. No, I don't own Rite Aid stock - but come to think of it, I might look into that.
So the toilet does not compost as quickly as the literature suggests, at least not in the dry desert air. There is no stench and it is not unsightly because everything gets covered immediately with compost mix so that it just looks like more of the same. However, if you want to dig deep into some of the older stuff, you will find that it is still there; it has not magically changed to dirt.
I went to Home Depot and bought a Garden View Compost Mixer. The reviews said it works but the handle breaks, so I wear rubber-vinyl mesh gloves to get a good grip and push up on the barrel to spin it, using the handle only as an assist. It has numerous rows of holes that can be closed and since this air is dry, I close them all. Otherwise, the water I pour in there spurts out the holes. It already gets enough ventilation from the seams, though the water drips out of them too.
|
|
After assembling it and putting it where I wanted it, I leveled it with blocks of wood. I scooped up the pile of dried compost where I had been dumping it and dropped it into the composter. When I have a near full compost toilet drawer, I dump it in there. Every so often I pour in a 5 gallon bucket of grey water which tries to quickly spill out the bottom, so I rotate it 180 degrees fast until the wide lid ends up on the bottom. That traps some of the water so that it can soak in and do its job, that is - if I secured the lid tight; if not, then the lid flips open underneath and everything spills out.
It is a good idea to store some kind of tub underneath. It also pays to securely lock that lid before you roll it because its own lock does not get a good grip. What I did was remove the hook from one end of a narrow bungee cord and permanently knot it inside one of the ventilation holes so that the hook on the other end of the cord hangs free. I then drilled a hole in the opposite side of the sliding lock. After I pour the water in I slam the door shut, slide the lock in place, slip the hook into the hole, and spin the barrel 180. I even marked the 180 position with white nail polish so that I don't have to guess.
More in 2011: "Sculpting An eComposter"
Roofs That Don't Leak:
In 2005 I
built a tool house with a dormer and a urinal. Prior to that, the only place I could store anything was in my van and in my enclosed box trailer. I proceeded to wrap one wall of the new tool house around the open end of the box trailer locking them together so that I now had a 4x4x8 addition attached to one side of the house. This worked well except that the plywood roof of the box trailer leaked.
In 2006 I
built a frame on top of the plywood roof and put a corrugated fiberglass roof over that, but I did it wrong. Where this new roof met the wall of the tool house, I just squeezed in a long glob of silicone sealant, which turned out to be completely inadequate. A heavy rain would still manage to send a lot of water into the improperly sealed seam, so that I had to keep some tubs inside and under that seam to catch the water. The water was useful; it was used to flush out the urinal, but getting to the 8' lumber, trim and other stuff that I stored in that place above the plywood and below the frame proved to be something of a nuisance. Sometimes, I am not really too smart.
In 2008 I
added an outdoor shower to the opposite side of the tool house, which is now called the utility house since I have
added solar panels to the roof with the solar electronics inside, along with a built-in computer desk.
In 2009 I
added a corrugated fiberglass roof over the shower. This time I did it right. I don't know if they didn't have them in stock at the time or I just missed them, but this time I discovered that they have special corrugated panels designed for covering that seam between the roof and the wall, and I used them. Consequently, the shower roof never leaks. I also used their recommended screws to attach the panels instead of my own less than perfect concoctions.
In 2010 I added a pair of these short angled panels to the box trailer roof where it meets the house wall. I would like to say they worked, but I don't know. It did not rain until after I departed in May, so I left the tubs in place just in case. I suspect that the new panels did do the job and that no wind driven rain found its way inside. I will know when I return there in October - or during the next rain after that.
|
|
However, I am now contemplating removing the box trailer and closing up that wall of the utility house. The box trailer will retain a position of honor nearby because it has been with me since about 1967 and has served me well.
Then I may just build a small cabin in approximately the same spot after removing a few boulders, next to the existing utility house but separate to keep it legal. However, that cabin will be 8x12. The existing utility house floor is 8x8 which is a bit problematic when you are working with 12' lumber. At the time, I mistakenly thought that 8x8 was the absolute maximum allowed for a "shed" to avoid the permitting process. I have since learned that they have no problem with 8x12. If I decide to do that, than I will be able to sell off the van, which is something of an eye-sore anyhow, and store all of its contents in the new cabin. (Notice how I am subtly talking myself into this.)
Bye!
|
|
|
