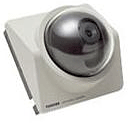
Model: IK-WB01A
IK-WB11A
IK-WB11A
|
Model: IK-WB01A IK-WB11A |
|||
| Remote Access Guide | |||
|
|||
1. Connect camera(s) to router LAN port(s) with Ethernet cable(s).
Note: It must be the same router that your computer is accessing
2. Power up cameras [or] if they were already powered up, disconnect the power and then reconnect after a few seconds. If you suspect your camera has been used before, refer to Step #7 for setting to defaults
3. Temporarily disable firewall software, popup blockers, privacy managers, internet security suites, and anti-virus applications (until we are done)
4. Get the required (free) software:
• Go to
http://www.java.com and download and install the newest version of java.
• Go to http://www.toshiba.com/taisisd/netcam/support/downloads/camfinder101.exe to download and
install Camera Finder.
5. Run Toshiba Camera Finder (Start Menu >Programs > Toshiba Network Camera) and press ‘Search’.
6. Select the first (next time select the 2nd, etc) camera from the list and then click the ‘Administrator’ button.
7. Log into the camera using the default username and password. (username: root | password: ikwb)
Note: If you can’t log in, default the camera by holding down the reset button located in a small pinhole
on the side of the camera until the camera lens begins to move.
8. Click on ‘Network Settings’, and select the subcategory ‘General’ to display the camera network settings.
9. Locate the ‘DHCP’ setting and set it to ‘Off’. You will notice the information below becomes editable.
10. In the IP address field there are 4 sets of numbers separated by periods. Change the last set to 90.
Hint: For the next camera, you would use 91, and the next camera 92, and so on.
11. Scroll down to where it says ‘http port’ and change it to 8000.
Hint: For the next camera this should be 8001, after that 8002, and so on.
12. Hit 'Save', and then when prompted, hit the 'Reboot' button and let your camera count down.
(Click 'Exit' and close all open windows and applications.)
13. Log into your router using the web interface. If you don't know how, consult your router's manual for instructions on doing this. If the router password has been changed, you should have that information.
• Usually, you can locate instructions for doing this at
http://www.portforward.com/routers.htm
• That site will also give you instructions on setting up “Port Forwarding” in your router
• Some routers refer to this as “Virtual Server”, “Pinhole”, “NAT”, “NAPT”, or “Firewall”
|
D-Link® Routers 14. Open a web browser and go to “192.168.0.1”. Log in using the default user name and password. 15. Go to ‘Advanced’, and then click the button Virtual Server’. Here you can create a new virtual server for your camera. You will need to do one complete entry for each camera.
16. a. Select the option to enable the virtual server. For the ‘Private Port’ and ‘Public Port’ fields, you should put 8000 indicating that you want to forward external port 8000 to internal port 8000.
b. Next to IP address, you will need to enter the whole IP address for the corresponding camera. c. The protocol should always read ‘TCP’. The schedule should be set to ‘Always’.
d. Enter ‘Netcam1’ in the ‘Name’ field. e. Click ‘Apply’ to save the changes. Repeat process for additional cameras as needed. |
|
Linksys® Routers 14. Open a web browser and go to “192.168.1.1”. Log in using the default user name and password. 15. Click “Applications and Gaming” [or] “Advanced” then “Port Forwarding” (depends on model).
16. a. Enter ‘Netcam1’ in the ‘Application Name’ field.
b. For the ‘Starting Port’ and ‘Ending Port’ fields, you should put 8000 and 8000, indicating that you want to forward external port 8000 to internal port 8000.
c. For 'IP Address’, enter just the last set of numbers in the IP address for the corresponding camera. d. The protocol should always read ‘TCP’. Put a check mark in the box under ‘Enabled’.
e. Push ‘Save Settings’ to create the entry in your routers port forwarding table. |
|
PLEASE READ Some DSL Modems may need to be set to ‘Bridged Mode’ in order for router port forwarding to work properly. If you go into your router’s status page, and it has an IP address beginning with 192.168.x.x, then you have a modem/router and it needs to be ‘bridged’ so network routing can be handled by your router instead. Contact your ISP for assistance in making this change. |
17. Most broadband plans from internet service providers include 1 Dynamic IP address. This means that it will change from time to time (some more frequently than others). Although by this point your camera may be “Remotely Accessible”, the address someone on the outside of your network would have to type to get to your camera may be different every day. Keep in mind that most ISPs do offer a 'Static IP' option for an additional cost, and there are even a small handful that will give you one upon request. The additional costs of a Static IP can be high, so Toshiba has given you the option of using our DDNS (Dynamic Domain Name Server) service: http://www.camerawebpage.com. This will allow you to have a web address (that will never change), but will always forward you to your camera. The service will give you 3 months for free and then it's only $19.95/year. To sign up just visit the site mentioned above.
|
If you have a CameraWebPage.com Account
18. Open up Camera Finder again, and press search. Select the camera you are working on, and enter in the corresponding port number in the box below labeled ‘Http Port'. 19. Click ‘Administrator’ to log in. This time go to ‘Network Settings’ and then ‘DDNS’. 20. Turn this on, and input your CameraWebPage.com user name and password. Click ‘Save’ 21. That camera should now work on CameraWebPage and be remotely accessible by DDNS or IP address. |